Wednesday, 10 August 2011

The Best GF Pizza Crust

Hello my friends!

I made lasagna for friends who had a sweet little baby recently (hi Frances!) this morning and made an extra for some of my fam to have for dinner. Its my hubby's birthday and he loves lasagna. So even though we had spaghetti this week, they got lasagna anyway. No complaints though as everyone likes it! I do too and was tempted to eat a piece anyway, but didn't have to think very long before changing my mind! Smart choice :) My stomach is thanking me!

I made a pizza for the little boy and myself. I made this same recipe last week and loved it. I thought about posting it but at the time didn't want to take pics or anything. I just wanted to eat it!!! So I made a few small changes and have it for you today. The pizza I posted a while back was delish but there is just something about a yeasted dough that makes it sooo much better! It doesn't even taste gluten free!!! Or vegan! Thankfully we are okay with yeast... I'm sorry if you're not. Seriously... its very sad for you. But you can make the other crust and still have a yummy pizza!

So, here we go! The dough takes a while to complete (with the rising) so read it all and plan ahead before you decide at the last minute that you want pizza for dinner! Also, the recipe looks a bit complicated but its really not.
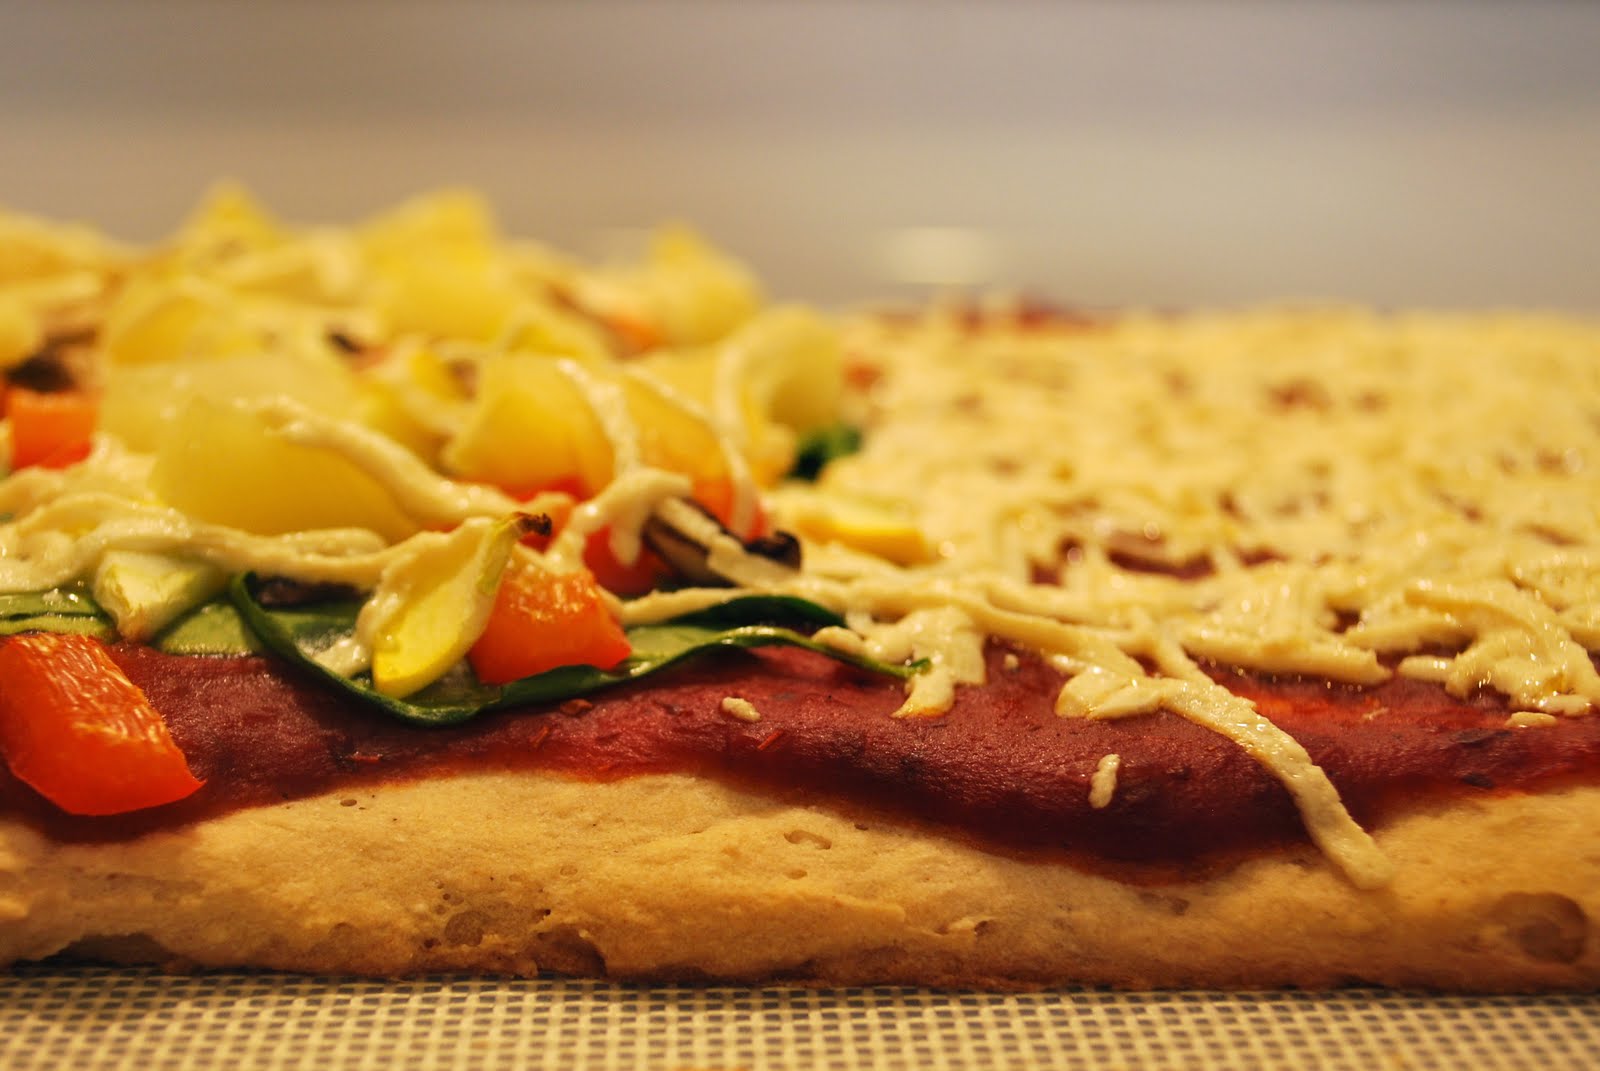

sorry for the yellowy pics... not good lighting in the kitchen and the table was already set!

The Best GF Pizza Crust

Place a pizza stone in the oven and turn on to 170F to preheat.

1/4 c warm water (115-120 degrees)
2 1/2 tsp active dry yeast
1 tsp coconut sugar

Combine above ingredients in a small bowl and allow yeast to proof/foam (usually takes around 10 mins) If yeast doesn't foam, its probably dead or you may have used water that was too hot.

3/4 c tapioca starch (or tapioca flour, same thing)
3/4 c white rice flour
1/2 c brown rice flour
2 tbsp sorghum flour
1 1/2 tbsp coconut sugar
2 tsp xanthan gum
3/4 tsp sea salt

Combine these dry ingredients in the bowl of your mixer. Use the paddle attachment to combine on low speed.

2 1/2 tbsp olive oil
1/2 tsp cider vinegar
1 tbsp agave

Combine above ingredients in a small bowl and set aside.

1/4 c water
3 tsp egg replacer

Whisk together replacer and water.

Add egg replacer mixture, olive oil mixture and yeast mixture to the dry ingredients. Mix on low until mostly combined.

Pour in an extra 1/2 c water and mix well - it will look like cake frosting.

Place a piece of parchment big enough for the pizza stone on the counter and turn dough onto it. Carefully spread dough out evenly.

Place parchment on the hot pizza stone. Turn OFF the oven and place pizza stone back in. Allow dough to rise for 40 mins.

After rising, turn oven on to 375F and pre-bake crust for 12 minutes.

Add sauce and toppings and increase oven temp to 425F. Bake until bubbling and golden (15-20 mins)


on my side - spinach, red pepper, yellow zucchini, mushrooms, pineapple and moz daiya 'cheese'

Sunday, 7 August 2011

Allergy Free Brownies (Gluten Free and Vegan)


For the love of all things delicious.... make these brownies!!!

I had begun to think that I would never taste another brownie again - unless I wanted to double over in pain afterward. I stumbled across this recipe on the interwebs and had to modify it a bit to make fudgey fantastic brownies. They came together in a snap and the hardest part was waiting for them to cool!

Allergy Free Brownies

1/3 c brown rice flour
1/3 c white rice flour
1/3 c sorghum flour
1/4 tsp xanthan gum
1/2 c dark cocoa powder
1/2 tsp baking powder
pinch of salt
1/4 c oil
1/4 c brown rice syrup (or date syrup, if you have it)
1/4 c agave nectar
1/4 c maple syrup
1/4 c unsweetened apple sauce
1/4 c water

Preheat your oven to 350.
Line an 8x8 pan with parchment or foil.
Whisk dry ingredients together in one bowl.
In another bowl whisk together wet ingredients - it will be sticky but then smooth out.
Add wet to dry and combine with a spatula.
Pour into prepared pan and smooth out.
Bake for 25 minutes.
Let cool completely before cutting.

Notes:
You can use 1 c all purpose flour instead of the other flours and xanthan gum.
After I poured in the canola oil I realized that I should have tried it with coconut oil - let me know if you test it out with coconut oil before I get a chance to!


Now please excuse me while I go eat the rest of the pan, if there's any left... I wonder if I have an coconut milk ice cream in the freezer?

Friday, 5 August 2011

Cherry Crisp

Hello lovely people!

This afternoon was a long one and I think I deserve a little time sitting with my feet up and writing a post! I just spend 4 hours in the kitchen prepping, chopping and cooking three different versions of dinner for my family. I haven't even tackled the dishes yet... that will be at least another hour! Gah! Cooking for the 6 of us is a huge challenge. Sometimes I just want to throw in the towel and order pizza but even that doesn't help! Four out of 6 are allowed pizza. Tonight's dinner was something simple, you'd think, pasta! Love it! But I have to make meat sauce for J and the kids and veggie sauce for me. Also wheat pasta for J, the girls and Boy1 and rice pasta for Boy2 and myself. Today I went crazy and made pasta bakes in a effort to get some of the dishes done before dinner was served. I think I made a small dent... But I had to make 3 pasta bakes... meat+wheat+cheddar, meat+rice+daiya and veggie+rice+daiya. Thank goodness there are leftovers!!! My sauce was lovely. I've been trying to eat more veggies that I don't like or haven't given myself a chance to like. Mushrooms are one. But I diced 'em up small along with red and green peppers, yellow zucchini and broccoli stems (the rest of the broccoli I blanched and served along side dinner) and the sauce was yummy! I don't really know what to do with the rest of the mushrooms but I'll figure something out.

I bought a ginormous bucket of pitted tart cherries at Loblaws on quicksale (50% off) for $11!!!! Talk about a steal! I've loaded up the freezer with bags for smoothies (they make an awesome smoothie along with banana, spinach and a splash of pom juice!) I figured I'd better do some baking with the rest!


Cherry Crisp

5 c tart cherries, pitted (thawed and drained if using frozen)
1/2 - 3/4 c agave nectar (depending on how tart your cherries are)
3 tbsp arrowroot starch or cornstarch
1 tsp vanilla
1/4 tsp almond extract (optional)
1/2 tsp salt

Topping

1 c Namaste perfect flour blend
1 c gluten free oats
1/2 c coconut sugar or sucanat
1/4 c coconut flour
1 tsp salt
1/2 c coconut oil, melted

Preheat oven to 350.
In a large bowl combine cherries and agave. Sprinkle arrowroot over top and stir well. Add in extracts and salt and combine. Pour into a large baking dish.
In a medium bowl combine flours, oats, sugar and salt. Pour oil in a little at a time, tossing after each addition. Once its all added you should have a crumby mixture and no dry flour.
Pour crumbs over the cherry mixture.
Bake for 35-40 minutes until bubbling and golden brown.


*tap tap*
Is this thing on?!
If you enjoy reading my blog, I'd love to hear from you! Leave a comment! :)

Friday, 22 July 2011

Popcicles!

Hi everyone!

Sorry I've been a bit of a slacker in blogging... but my kids are all home and it's hard to think about blogging and take pics of food! Not to mention this super hot streak that we've been having... who wants to even do anything when its 40+ degrees outside?! Well, maybe make popcicles, but that's about it!

We did paint nails though.


Girl2 had art camp this week, which she enjoyed tremendously. She lost another tooth while there and she brought home lots of fun art pieces and I think just loved being able to be creative all day, every day, for 5 days straight! I asked her what she did during free time... three guesses.... drawing. Heh. What did she do at recess? Sidewalk chalk. The girl was in heaven!!!

Plus, she's really special.


We've been making tons of popcicles in our lovely Zoku that my friend Helen gave to my kids for their birthdays last year. Man, I love that thing... As long as I keep it in the freezer, ice pops are never more than a few minutes away!!! None of this chilling over night business. When I was at Golda's Kitchen last month, I saw a cookbook that I wanted real bad... it took a lot of self control to only look at it and then place it back where I found it... The book is Ice Pop Joy. How could I not want this book?!? Organic, healthy, delicious treats! After one quick scan through it, I was all inspired to make some popcicles when I got home. Then I forgot about it. Until we went to the library this week! What jumped out at me from the shelf!? Why, Ice Pop Joy!!! :) Now I can pretend its mine for a few weeks!

Boy1 took a peruse through and chose out the "Bluebird" pops to make first. We almost had everything in the house so I only had to make a few small changes. I don't have acai powder so I added in some greens+ kids that I use in their smoothies. And I added some tofu for a little bit of protein and creaminess. They turned out great! Loved by all 4 kids. And me.
Just pretend there is a picture of a purpley popcicle...

Bluebird Ice Pops
Adapted slightly from Ice Pop Joy by Anni Daulter

1/2 c blueberries
1/2 c blackberries or boysenberries
1 c chopped fresh pineapple
1 scoop greens+ kids (natural mixed berry flavour) or 2 tsp acai powder
4 tbsp coconut/palm sugar
1 c purified water
1/4 c silken tofu (optional)

Put everything into a blender and blend until smooth.
Pour into your choice of popcicle molds and freeze until solid.

We also made tropical popcicles, not from the book though. From my head. They were delish too!!!


Tropical Popcicles

2 bananas
2 c R.W. Knudsen Pineapple Coconut juice
2 tbsp orange juice (optional)

Blend it up and freeze it!!! Easy shmeasy.

While we were at the library there was a lady from Starbucks handing out little samples of Passion tea and iced coffee. Both yummy. She also gave me a receipt for a $2 grande beverage, so I treated myself to a cup of icy deliciousness on the way to picking up the girl from camp. Passion Tea Lemonade. Oh my... so refreshing! Not so healthy with the sugar syrup but I knew I'd be able to make it at home without the crap. It doesn't taste exactly the same, but I'd need to do a side by side comparison to be the parts right. But its really very easy! Plus, it made some great ice pops too!!!


Starbucks Passion Tea Lemonade

2 c water
4 Starbucks Passion tea bags
1/4 c agave nectar (or to taste)
1 carton Kiju Lemonade or other sugar free lemonade

Boil water and pour over tea bags. Carefully stir in agave. Allow to steep until cold, in the fridge.
When tea is cold remove tea bags, pour in lemonade and give it a good stir.

Make popcicles!


Or as my friend Sheena suggested, blend cold lemonade with ice for a slushy beverage!

Stay cool friends!

Friday, 1 July 2011

Rice and Black Bean Salad

Hi friends!
Happy Canada Day! We are enjoying this beautiful day together as a family! It's the first day of summer vacation and the kids have succeeded in trashing the house with Playmobil and Lego, they've played some sort of house/work game and now are outside in the blow-up pool testing to see who's Lego creations can float the best. From the looks of it, there are rigorous tests going on - splashing, wave making and canon firing. :) They are having a ball! I love my kids! And summer!!!

Here is a lovely recipe for you that I created. Its lovely cold or at room temperature and would be a great thing to bring to a pot luck. Just make sure to chill it for a few hours to bring out all of the flavours.


Rice and Black Bean Salad

1 c short grain brown rice
2 c water
1 can black beans, drained and rinsed
2 stalks celery, finely chopped
1/2 red or orange pepper, finely chopped
1/2 c corn kernels (optional)
1 green onion, finely chopped (optional)

Dressing

1/2 tsp lime zest
juice from 2 limes (roll them on the counter to get the most juice)
1 tsp mustard
1-2 tbsp agave
pinch each salt, pepper, ginger powder
2 tbsp olive oil

Combine rice and water in a medium pot. Bring to a boil over high heat. Cover and reduce heat to low. Cook 35-45 minutes or until the rice is tender and the water is absorbed. Remove from heat and let stand 10 minutes. Fluff with a fork and transfer to a large bowl. Allow to cool.
Add beans, celery, peppers and corn to the rice and mix with a wooden spoon to combine.
To make the dressing combine zest, juice, mustard, 1 tbsp agave, s&p and ginger in a small bowl. Whisk to combine. Whisk in olive oil. Taste. Add in more agave if its too sour.
Pour dressing over the rice mixture. Stir well to distribute the dressing.
Cover and refrigerate for 2 hours to allow the flavours to meld.
Sprinkle green onions on top.
Serve with nacho chips, if desired.


Thursday, 23 June 2011

Quick Creamy Pasta Salad

Hey folks,
Just a quick post today - birthday month is winding down and we're ending it off with two birthday parties this weekend! I'm super busy baking and getting stuff ready for the parties and I also have to do flowers for a wedding on top of it all!

I took a healthy lunches cooking class at Health Span in Georgetown, hosted by Chef Jenny Allen. It was awesome and I came out of there with 5 recipes that I could very easily modify to avoid allergens! Score!!! All of her recipes are based on simple, natural ingredients and use natural sweeteners. And they all have a gluten-free/dairy-free option. The class was great and if you live in the Georgetown/Brampton/Mississauga area I highly recommend you check it out! Chef Jenny is always adding new classes to her schedule and each one is a new opportunity to get fabulous new recipes! Here is a link to Jenny's website which has recipes and info about classes: http://www.jentreewholefoods.com

On to the recipe! Make this... it's so easy and delish!!!


Creamy Pasta Salad with Grapes (and roasted chicken if you eat meat!)

2 c dry rice rotini or twisted kamut/quinoa pasta, cooked, rinsed and tossed with 2 tsp EVOO
1 1/2 c red or green grapes, halved
1 1/2 c roasted chicken diced or shredded (optional, I use 1/2 - 3/4 c navy beans instead)
1/2 c vegan mayo (or Hellman's olive oil mayo if you can tolerate eggs)
2 tbsp fresh dill or tarragon, chopped
3 green onions, minced (I leave these out and its still great!)
juice of 1/2 lemon
pinch sea salt and pepper
2 c baby spinach or chopped romaine

In a large bowl, mix together mayo, dill, onions, lemon juice, salt and pepper.
Stir in cooked pasta, chicken if using and grapes. Chill in the fridge until ready to serve.
To assemble, toss 1 c prepared pasta with 2 cups spinach or lettuce (for an adult size portion.)

Can be made ahead of time and stored in the fridge. Add spinach or lettuce just before serving.

Makes 8 servings

Wednesday, 8 June 2011

Yummy Lunch

Hi everyone,
It's a scorcher out there today!!! I don't usually love the heat, but so far this summer I've been loving every minute of the hot days we've had. Even though today feels like 42C with the humidity, I didn't even mind taking the boys out for a bike ride this afternoon. :) I'm just thankful for the air conditioning so we can sleep at night without sticking to the sheets!!!

Here is a recipe for buckwheat/millet bread that I made yesterday. I've made it before but wanted to try baking it differently before I posted it. It turned out great and thin enough to build a sandwich on. The boy and I love it and my favourite thing is that its chock full of goodness (unlike store bought rice bread which is not very nutrient-dense.) I was a little worried about using buckwheat flour... I really don't like buckwheat honey and I knew that the flour has a really strong taste. As I was mixing it up it smelled kinda grassy and I thought to myself, 'This should be interesting...' But it baked up wonderfully and I really love it!

Buckwheat contains 8 essential amino acids, is high in fiber and contains many minerals, including phosphorus, magnesium, iron, zinc, copper and manganese. The buckwheat flour is offset by millet flour is this recipe. Millet is one of the least allergenic grains and is easily digestible. Like buckwheat, millet is high in protein and fiber. It is also high in iron, magnesium, phosphorus, and potassium. Chia seeds are used in the bread to help bind it. The original recipe called for half chia and half flax but I can't have flax every day so I opted to use all chia. Chia seeds are also packed with nutrients - they are the richest plant source of omega 3, contain antioxidants, fiber, iron and more. Tons of goodness packed into one tiny seed! Yay for goodness!!!

Now that you've all had a nutrition lesson.... here's the recipe! ;)


Buckwheat/Millet Bread
Adapted from the edible perspective

1/2 c plus 2 tbsp buckwheat flour
1/2 c plus 2 tbsp millet flour (I grind my own in a blender)
1/4 c chia seeds (or ground flax)
1/2 tsp baking powder
1 tbsp sucanat
1/2 tsp sea salt
1/8 tsp pepper
1/2 c plus 1 tbsp rice milk or milk of choice
3/4 c water
2 tbsp olive oil

Preheat oven to 375F and line a 9x13 pan with parchment (cut the corners so it fits nicely.)
In a medium bowl, whisk together dry ingredients. Add in liquids and mix thoroughly with a wooden spoon. Pour into the prepared pan and smooth evenly.
Bake for 18-20 minutes or until the top is dry and has cracks. Cool in pan for 10 minutes then using parchment, slide the bread out onto the cooling rack to cool completely.
Cut into six large pieces for sandwiches or cut to whatever size you fancy!
You can keep it in a sealed container at room temp for a day but after that, leftovers should be refrigerated.